FileZilla is an open source FTP client, it is available on multiple platforms like Linux and Windows. This client also supports FTP over secured connections that is SFTP and FTPS. You can use this software to upload and manage your files in your webserver. When you wish to upload your website and number of files are more or size of files are very large. Then you can use FTP upload, because uploading a file of very large size through cPanel File Manager can cause an error in uploading.
Most of the cPanel accounts comes with a system FTP account, through which you can access and manage all the files in your home directory. Passwords of system account for cPanel and FTP are same in most cases.
To use FileZilla FTP client, to manage and upload the website, please follow these steps −
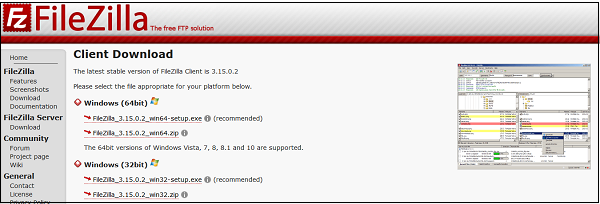
Step 1 − Download and install FileZilla FTP client from FileZilla website. The installation process of this software is the same as other software’s.
https://filezilla–project.org/download.php

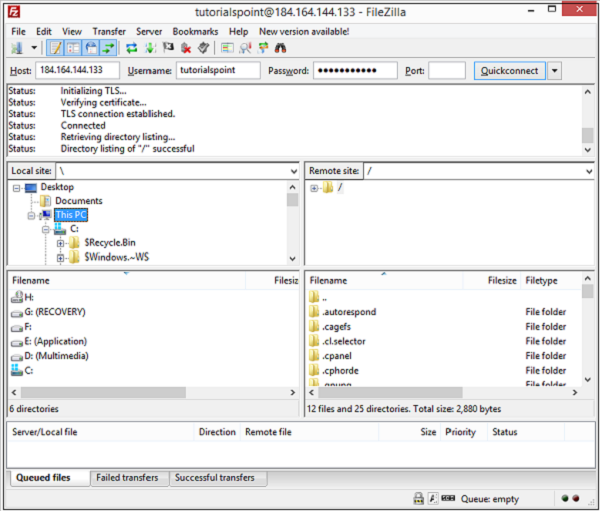
Step 2 − After installing open your FileZilla FTP client. In the quick connect bar, you will find text box to provide hostname. Enter your ftp hostname, which can be IP address of your server or ftp.<your_domain.com>.
Step 3 − Enter the username and password for your ftp account.
Step 4 − Enter Port on which you want to connect to your FTP server. In most of the cases, it is 21, but if you leave this field empty then FileZilla will automatically find the appropriate port to connect.

Step 5 − Click Quickconnect to connect to the FTP server.
Step 6 − After a successful connection, you can move or copy files from the left hand side pane (which are your local computer directories) to the Right hand pane (which are your remote server directories and files). You can drag and drop files from the left to right pane or vice versa.
Step 7 − You can view the status of your moving or copying in the pane, which is on the lower side of the interface.
